A standalone QO-100 (Es'hail-2) digital amateur TV receiver. Runs on a Raspberry Pi 4 or 5, driving a MiniTiouner tuner, with a fullscreen touchscreen app that shows the spectrum, decodes the video, lets you tap to tune, and connects to the QO-100 wideband chat. Everything is operated by touch — no keyboard or mouse needed once it's set up.
 |
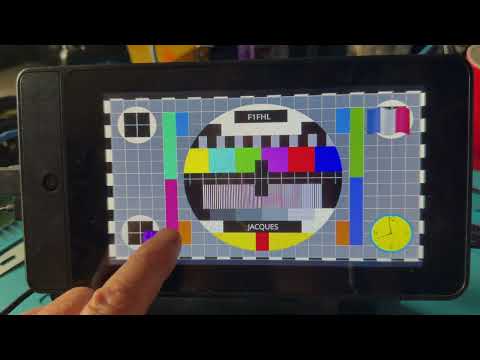 ▶ Tap to play video |
- Raspberry Pi 4 Model B or Raspberry Pi 5, running Raspberry Pi OS (Bookworm or newer) with a desktop.
- A MiniTiouner tuner. Tested with the Pro TS2 and the S — other variants (Express, original) likely work too but haven't been tried.
- A touchscreen — either the official 800x480 Raspberry Pi touchscreen or a 1024x600 DSI panel (switchable any time from SET in the app).
- Something to play audio through. The Pi 5 has no 3.5mm audio jack (the Pi 4 does); either way, a DSI touchscreen has no speaker of its own, so there's no built-in audio output for a Pi 5 kiosk setup like this one — a Bluetooth speaker is the easiest fix, pair it once in Raspberry Pi OS's Bluetooth settings and it just works. A USB audio adapter or an HDMI-connected display with speakers works too, if you'd rather avoid Bluetooth.
- Internet access on the Pi — needed for setup, and also ongoing during normal use (the spectrum display and chat both come from live internet feeds, separate from the tuner itself).
Everything below is done by typing commands into a terminal — a text-based command window. On the Raspberry Pi desktop, open one from the taskbar (look for a black screen icon) or the applications menu, usually under Accessories > Terminal. Each step below shows exactly what to type; type or paste it in, then press Enter to run it.
Paste this whole block in at once — it puts the project in a DATVreceiver
folder in your home folder, then runs its setup script.
cd ~
git clone https://github.com/HB9IIU/QO100-RASPI-RECEIVER.git DATVreceiver
cd ~/DATVreceiver
scripts/initialSetup.sh
The setup script does everything: installs all the software this app needs,
downloads one small third-party library it depends on, builds the app, sets
it up to start automatically at boot, and reboots the Pi at the end —
that last part matters, the MiniTiouner's USB permissions don't reliably
take effect without it. It will ask for your password along the way, and
asks for one Enter keypress up front to confirm before it starts. Safe to
re-run (from cd ~/DATVreceiver && scripts/initialSetup.sh) if something
goes wrong partway through.
Plug the MiniTiouner into a USB port before or during this step, if it isn't already.
Once the Pi finishes rebooting and you're logged back in, the receiver should appear on its own, fullscreen, tuned to the QO-100 beacon. If it doesn't:
systemctl --user status qo100datv.serviceThis shows whether it's running, and if not, why. If it says "No MiniTiouner detected on USB" on screen: check the tuner is properly plugged in. If it doesn't lock onto a signal: make sure the antenna/LNB is actually pointed at QO-100, and check the SET page for the LNB settings (LO offset, bias voltage) match your hardware.
The app checks for updates on its own each time it starts, and offers to install one right from the touchscreen if it finds one - no keyboard or computer needed. This covers routine code updates (pulls the latest version and rebuilds); it doesn't touch system packages, udev rules, or reboot, so it never needs a password.
If an update ever needs more than that (a new dependency, a udev rule change), do a full update by hand instead:
cd ~/DATVreceiver
scripts/initialSetup.sh
Same script as the initial install (now pulls the latest version itself before rebuilding), safe to re-run any time.
- Tap anywhere on the spectrum display to tune to that signal.
- CHAT — opens the QO-100 wideband chat.
- SET — LNB settings (local oscillator offset, bias voltage), screen resolution, what EXIT does (see below), and whether the app auto starts at boot. The SET page's own EXIT button just closes the SET page and returns to the main screen — a different action from the main screen's EXIT button described next, despite sharing the name.
- SCAN — automatically hops between detected signals.
- EXIT — closes the app; it restarts itself a few seconds later by default. SET has an Exit Button Behaviour option to change this to Full Stop instead, where EXIT closes it for good until you start it again yourself (from the desktop icon).
A small gallery you can browse from any device on your home network, including a Take Screenshot button on the page itself (useful when the app is fullscreen with no touch access — it captures whatever's currently on screen, not just this app). To turn it on:
cd ~/DATVreceiver
scripts/setup_photo_album.sh
This prints a web address to open in a browser (e.g. http://<pi's IP address>:8090/). Keeps the most recent 300 screenshots by default; delete
individual photos or select several for bulk delete right from the page.
cd ~/DATVreceiver
scripts/uninstall.sh
Undoes everything the setup steps above did — stops and removes both
background services, the desktop shortcut, the MiniTiouner udev rule, and
the UDP-buffer system tweak — then deletes the DATVreceiver folder
itself, screenshots and saved settings included. No confirmation prompt;
back up anything you want to keep first. Installed software packages (apt)
are left alone — see the script's own comments for why.
| Path | What it is |
|---|---|
longmynd_ws/ |
The tuner driver (a modified version of an existing open-source project), talks to the MiniTiouner over USB. |
qo100_sdl/ |
The actual app — the touchscreen UI you see and use. |
screenshots/ |
Where the photo album keeps screenshots. |
scripts/ |
The setup scripts described above. |
Default tuning at startup is the QO-100 beacon: 741474 kHz, 1500 ksps.
GPLv3, matching Longmynd (longmynd_ws/), the tuner driver this project is built on and vendors directly.
I put this together for fun, after finding a couple of unused Raspberry Pis with displays sitting around and wanting to do something with them — I didn't invent any of the real engineering here, I just assembled it. Real thanks are owed to:
- Heather Lomond, who wrote Longmynd, the actual driver talking to the MiniTiouner hardware and doing the real DVB-S/S2 work underneath this whole receiver.
- Phil Crump, whose fork of Longmynd adds the websocket status/control server this project builds on.
- BATC (British Amateur Television Club), whose live wideband spectrum feed and QO-100 chat this app connects to.
- Andy Green, author of libwebsockets, used throughout for all of the above.
- Tom, ZR6TG, whose OpenTuner interface was the spark that got me wanting to build this in the first place.
- Steve, GH7VHG, for testing the first release.
- Claude, who helped me build, debug, and optimize this — patiently, over a lot of iterations.
Feel free to use, copy, and modify any of this for your own QO-100 setup. If you get stuck, open an issue and I'll try to help when I can, though I can't promise a quick turnaround.