The WiRSa v3 is a WiFi-to-RS232 serial adapter designed for legacy computing systems. It allows vintage computers to connect to modern networks via WiFi, supporting telnet BBS connectivity, file transfers, and network gateway functionality.


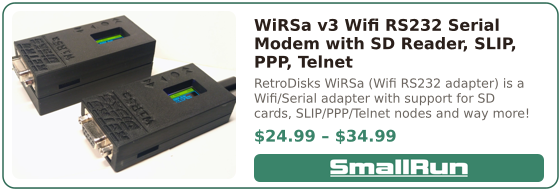
If you prefer to save yourself some time, I have some units (fully assembled or kit) available for sale. I had quite a few PCB's made up and I am trying to keep these as cheap as possible. You can purchase on SmallRun.
- Processor: ESP-WROOM-32D with WiFi and Bluetooth 4.2 BLE
- Display: 128x64 two-color OLED display for settings, commands, and real-time data
- Serial Port: Female DB9 (DE9) connector
- Full RS232 Breakout:
- DSR/DTR (Data Set Ready / Data Terminal Ready)
- RTS/CTS (Request to Send / Clear to Send)
- DCD (Data Carrier Detect)
- RI (Ring Indicator)
- Storage: Built-in micro SD card reader for file transfers and text playback
- Power:
- USB-C power connector
- Optional 2000mAh 3.7V Li-Po battery (~14 hours runtime)
- Navigation: Four physical buttons for menu navigation

- MODEM Mode - Hayes-compatible AT command modem emulation for telnet/BBS connectivity
- Telnet Server - Built-in telnet server allows for remote terminal access
- File Transfer - Binary file transfer directly from SD card via XModem, YModem, and ZModem protocols
- Text Playback - Display text files from SD card through the serial port
- PPP Gateway - Point-to-Point Protocol gateway for TCP/IP networking
- SLIP Gateway - Serial Line Internet Protocol gateway
- Utilities - Diagnostics and troubleshooting tools including signal monitoring and loopback testing
- Config - Settings for baud rate, serial configuration, display orientation, and more
- AT Command Set - Full Hayes-compatible modem commands
- Web Interface - Built-in web server for status monitoring, configuration and file management
- Flow Control - Hardware (RTS/CTS) and software (XON/XOFF) flow control
- Speed Dial - 10 programmable speed dial entries
- PETSCII Translation - Support for Commodore computers
- Telnet Protocol - Automatic Telnet IAC handling
- OTA Updates - Over-the-air firmware updates via HTTP
.jpg)
- Connect to your computer via serial port (default: 9600 baud, 8N1)
- Enter your WiFi credentials using AT commands (2.4 GHz networks only):
AT$SSID=YourNetworkName AT$PASS=YourPassword - Save settings:
AT&W - Reboot or reconnect to apply
Use the dial command with the host and port:
ATDT bbs.example.com:23
Or configure speed dial entries:
AT&Z0=bbs.example.com:23
ATDS0
| Command | Description |
|---|---|
AT |
Test connection (returns OK) |
ATDT<host:port> |
Dial/connect to TCP host |
ATDS<0-9> |
Speed dial entry |
ATH |
Hang up connection |
ATA |
Answer incoming connection |
ATO |
Return online from command mode |
+++ |
Escape to command mode (during connection) |
ATE0/1 |
Echo off/on |
ATV0/1 |
Verbose results off/on |
ATI |
Display network info |
AT&V |
View current settings |
AT&W |
Save settings to EEPROM |
ATZ |
Load settings from EEPROM |
AT&F |
Restore factory defaults |
AT&K<0/1/2> |
Flow control (0=none, 1=hardware, 2=software) |
ATNET<0/1> |
Telnet protocol handling off/on |
ATPET=<0/1> |
PETSCII translation off/on |
AT$SSID= |
Set WiFi SSID |
AT$PASS= |
Set WiFi password |
AT$SP=<port> |
Set listening port |
ATS0=<0/1> |
Auto-answer off/on |
ATFC |
Check for firmware updates |
ATFU |
Perform firmware update |
AT? or ATHELP |
Display help |
ATX |
Exit MODEM Mode, return to WiRSa main menu |
The WiRSa supports binary file transfers directly from the SD card using industry-standard protocols:
- XModem - Basic 128-byte block transfer with checksum
- YModem - Batch file transfer with filename and size
- ZModem - Streaming protocol with CRC16/CRC32 and automatic resume
To transfer files:
- Insert SD card with files
- Select "File Transfer" from the main menu
- Choose the transfer protocol
- Select send or receive
- Initiate the transfer from your terminal software

The WiRSa provides full TCP/IP networking capabilities for vintage computers through two standard protocols: SLIP (Serial Line Internet Protocol) and PPP (Point-to-Point Protocol). These modes turn the WiRSa into a dial-up internet gateway, allowing retro systems to browse the web, use email clients, FTP, and access other network services.
Both modes operate as NAT (Network Address Translation) gateways:
- The vintage computer connects via the serial port
- The WiRSa performs NAT translation between the serial link and WiFi
- Outbound traffic is routed to the internet via the ESP32's WiFi connection
- The vintage computer appears to have full internet access
SLIP is a simpler, older protocol with less overhead. It works well with:
- DOS with packet drivers (ETHERSLIP, SLIPPER, etc.)
- Early Windows 3.x with Trumpet Winsock
- Classic Mac OS with MacSLIP or InterSLIP
- Linux with
slattach
Default Configuration:
- Gateway IP: 192.168.7.1 (WiRSa)
- Client IP: 192.168.7.2 (vintage computer)
- DNS: 8.8.8.8
PPP is more robust with built-in negotiation, authentication support, and error detection. It's the standard for:
- Windows 95/98/ME Dial-Up Networking
- Windows 3.11 with Microsoft DUN
- Mac OS 8/9 with PPP/Remote Access
- Linux with
pppd
Default Configuration:
- Gateway IP: 192.168.8.1 (WiRSa)
- Client IP: 192.168.8.2 (assigned to client)
- Primary DNS: 8.8.8.8
- Secondary DNS: 8.8.4.4
From the WiRSa Menu: (if your host OS is expecting an "always on" connection)
- Navigate to "PPP Gateway" or "SLIP Gateway" from the main menu
- Select "Start Gateway"
Using AT Dial Commands: (must set the device to Modem Mode first)
ATDT SLIP      - Enter SLIP mode
ATDT 7547      - Enter SLIP mode (phone keypad for "SLIP")

ATDT PPP       - Enter PPP mode
ATDT 777       - Enter PPP mode (phone keypad for "PPP")
Using AT Commands: (must set the device to Modem Mode first)
AT$SLIP        - Enter SLIP mode directly
AT$PPP         - Enter PPP mode directly
Port forwarding allows incoming connections from the internet to reach services running on your vintage computer. This is useful for:
- Hosting a BBS - Run a BBS on your vintage computer accessible from the internet
- FTP Server - Share files from your retro machine
- Web Server - Host a vintage web server (Windows 95 Personal Web Server, etc.)
- Game Servers - Host multiplayer games on classic systems
- SSH/Telnet Access - Remote into your vintage computer
Configuring Port Forwards:
From the menu:
- Enter SLIP or PPP Gateway menu
- Select "Port Forwards"
- Choose "Add Forward"
- Enter protocol (TCP/UDP), external port, internal IP, and internal port
Using AT commands:
AT$SLIPFWD=TCP,80,80      - Forward TCP port 80 to client port 80
AT$SLIPFWD=UDP,53,53      - Forward UDP port 53 (DNS)
AT$SLIPFWDDEL=0           - Remove forward at index 0

AT$PPPFWD=TCP,23,23       - Forward TCP port 23 (telnet)
AT$PPPFWD=TCP,21,21       - Forward TCP port 21 (FTP)
AT$PPPFWDDEL=0            - Remove forward at index 0
Note: Port forwards are shared between SLIP and PPP modes and persist across reboots.
Requirements:
- MS-DOS, DR-DOS, FreeDOS, etc
- A SLIP packet driver (ETHERSLIP, SLIPPER, or CSLIPPER)
- TCP/IP applications (mTCP suite, Arachne or MicroWeb browser, NCSA Telnet, etc.)
Step 1: Configure WiRSa
AT$SSID=YourWiFiNetwork
AT$PASS=YourPassword
AT&W
Step 2: Install Packet Driver
Create a batch file (e.g., SLIP.BAT):
@echo off
REM Load SLIP packet driver on COM1 at 115200 baud
ETHERSL 0x60 4 0x3F8 115200
REM Or for COM2: ETHERSL 0x60 3 0x2F8 115200
Step 3: Configure TCP/IP Stack
For mTCP, create MTCP.CFG:
PACKETINT 0x60
IPADDR 192.168.7.2
NETMASK 255.255.255.0
GATEWAY 192.168.7.1
NAMESERVER 8.8.8.8
Set environment variable:
SET MTCPCFG=C:\MTCP\MTCP.CFGStep 4: Connect
On the WiRSa, start SLIP Gateway by enabling from the buttons/screen menu, from the serial menu (exit terminal after Starting Gateway, it starts immediately), or by dialing
ATDT SLIP
Step 5: Test Connection
PING 8.8.8.8
TELNET bbs.example.com
Step 1: Create a New Connection
- Open "My Computer" → "Dial-Up Networking"
- Click "Make New Connection"
- Name it "WiRSa Internet" (or any name)
- Select your serial port modem (or "Standard Modem" on the COM port)
- For phone number, enter:
PPP(or777)
Step 2: Configure the Connection
- Right-click the new connection → "Properties"
- General tab: Ensure correct modem/port is selected
- Server Types tab:
- Type of Dial-Up Server: "PPP: Internet, Windows NT Server, Windows 98"
- Uncheck "Log on to network" (unless needed)
- Check "Enable software compression" (optional)
- Check "TCP/IP" under Allowed network protocols
- Uncheck NetBEUI and IPX/SPX unless needed
- Click "TCP/IP Settings":
- Select "Server assigned IP address"
- Select "Server assigned name server addresses"
- Click OK
Step 3: Modem Settings
- Go to Control Panel → Modems → Properties
- Set maximum speed to match WiRSa baud rate (115200 recommended, plus Flow Control enabled [AT&K1])
- Under "Connection" tab, set 8 data bits, No parity, 1 stop bit
- Make sure to put the WiRSa into Modem mode before proceeding
Step 4: Connect
- Double-click the connection
- Leave username/password blank (or enter any values - WiRSa ignores auth)
- Click "Connect"
- The WiRSa will respond "CONNECT PPP" and negotiate the link
Step 5: Verify Connection
- Open a command prompt:
ping 8.8.8.8 - Open Internet Explorer and browse!
Requirements:
- Windows 3.11 for Workgroups
- Microsoft TCP/IP-32 or Trumpet Winsock
- Dial-Up Networking 1.0 for Windows 3.11
Step 1: Install TCP/IP-32
- Run Network Setup
- Add "Microsoft TCP/IP-32"
- Configure with DHCP or manual IP (the WiRSa will assign IPs)
Step 2: Configure RAS (Remote Access Service)
- Install RAS if not present
- Add your modem on the appropriate COM port
- Create a new phonebook entry with phone number "PPP" or "777"
Step 3: Connect
- Open Remote Access
- Select your WiRSa entry
- Make sure WiRSa is in Modem Mode
- Click "Dial"
Linux has built-in SLIP support via the slattach utility. This guide covers configuring the serial port, enabling SLIP, and testing connectivity.
Requirements:
- Linux system with a physical serial port (directly connected to WiRSa)
- Root/sudo access
slattachutility (usually included innet-toolsorslippackage)
Step 1: Identify Your Serial Port
First, identify the serial device. Physical serial ports are typically:
# First serial port (COM1 equivalent)
/dev/ttyS0

# Second serial port (COM2 equivalent)
/dev/ttyS1

# List available serial ports
ls -la /dev/ttyS*

# Check which serial ports are available
dmesg | grep -i ttyS
Step 2: Configure the Serial Port
Before starting SLIP, configure the serial port to match your WiRSa settings. Use stty to set the baud rate and other parameters:
# Set baud rate to 115200, 8N1, no flow control
sudo stty -F /dev/ttyS0 115200 cs8 -cstopb -parenb raw -echo

# For hardware flow control (if WiRSa has AT&K1 enabled), add crtscts:
sudo stty -F /dev/ttyS0 115200 cs8 -cstopb -parenb raw -echo crtscts

# Verify settings
stty -F /dev/ttyS0 -a
Key stty options:
| Option | Description |
|---|---|
115200 |
Baud rate (match WiRSa setting) |
cs8 |
8 data bits |
-cstopb |
1 stop bit (use cstopb for 2) |
-parenb |
No parity |
raw |
Raw mode (no input/output processing) |
-echo |
Disable local echo |
crtscts |
Enable hardware flow control |
Step 3: Test Serial Communication
Before enabling SLIP, verify you can communicate with the WiRSa:
# Open a simple terminal session
# Press Ctrl+C to exit when done
sudo cat /dev/ttyS0 &
echo "AT" | sudo tee /dev/ttyS0

# You should see "OK" response from WiRSa
# Kill the background cat process
kill %1

# Alternative: use screen or minicom
screen /dev/ttyS0 115200
# (Press Ctrl+A then K to exit screen)
Step 4: Start SLIP Gateway on WiRSa
From your terminal session with WiRSa, enter SLIP mode:
AT$SLIP
Or dial into SLIP mode:
ATDT SLIP
You should see "CONNECT SLIP" response. Now exit your terminal program (the serial port must be free for slattach).
Step 5: Enable SLIP on Linux
Attach the SLIP interface using slattach:
# Start slattach in the background
# -p slip = SLIP protocol
# -s 115200 = baud rate
sudo slattach -p slip -s 115200 /dev/ttyS0 &

# Note the PID for later cleanup
SLATTACH_PID=$!
Step 6: Configure the Network Interface
Once slattach is running, a sl0 interface will be created. Configure it:
# Bring up the interface with the client IP
sudo ifconfig sl0 192.168.7.2 pointopoint 192.168.7.1 up

# Or using ip command (modern systems)
sudo ip addr add 192.168.7.2 peer 192.168.7.1 dev sl0
sudo ip link set sl0 up

# Add default route through the SLIP gateway (optional - routes all traffic through WiRSa)
sudo ip route add default via 192.168.7.1 dev sl0

# Or add only specific routes
sudo ip route add 8.8.8.8 via 192.168.7.1 dev sl0
Step 7: Configure DNS
Add the DNS server to your resolver configuration:
# Temporary - add to /etc/resolv.conf
echo "nameserver 8.8.8.8" | sudo tee -a /etc/resolv.conf

# For systems using systemd-resolved
sudo resolvectl dns sl0 8.8.8.8
Step 8: Test the Connection
Verify connectivity through the SLIP link:
# Ping the WiRSa gateway
ping -c 3 192.168.7.1

# Ping an external IP (Google DNS)
ping -c 3 8.8.8.8

# Test DNS resolution
ping -c 3 google.com

# Check routing
ip route show
Expected output for successful ping:
PING 192.168.7.1 (192.168.7.1) 56(84) bytes of data.
64 bytes from 192.168.7.1: icmp_seq=1 ttl=64 time=5.23 ms
64 bytes from 192.168.7.1: icmp_seq=2 ttl=64 time=4.89 ms
64 bytes from 192.168.7.1: icmp_seq=3 ttl=64 time=5.01 ms
Step 9: Cleanup (When Done)
To disconnect and clean up:
# Bring down the interface
sudo ip link set sl0 down

# Kill slattach
sudo kill $SLATTACH_PID
# Or find and kill by name
sudo killall slattach
Complete Setup Script
Here's a complete script to automate the Linux SLIP setup:
#!/bin/bash
# slip-connect.sh - Connect to WiRSa via SLIP

DEVICE="/dev/ttyS0"
BAUD="115200"
LOCAL_IP="192.168.7.2"
GATEWAY_IP="192.168.7.1"
DNS="8.8.8.8"

# Configure serial port
sudo stty -F $DEVICE $BAUD cs8 -cstopb -parenb raw -echo

# Start slattach
sudo slattach -p slip -s $BAUD $DEVICE &
sleep 2

# Configure interface
sudo ip addr add $LOCAL_IP peer $GATEWAY_IP dev sl0
sudo ip link set sl0 up

# Add route for external traffic
sudo ip route add default via $GATEWAY_IP dev sl0

# Configure DNS
sudo resolvectl dns sl0 $DNS 2>/dev/null || echo "nameserver $DNS" | sudo tee /etc/resolv.conf

echo "SLIP connection established"
echo "  Local IP:  $LOCAL_IP"
echo "  Gateway:   $GATEWAY_IP"
echo "  DNS:       $DNS"
echo ""
echo "Test with: ping 8.8.8.8"
Troubleshooting
| Issue | Solution |
|---|---|
| "Device or resource busy" | Another program is using the serial port. Close any terminal emulators. |
| No sl0 interface appears | Check if slattach is running: ps aux | grep slattach. Verify WiRSa is in SLIP mode. |
| Ping to gateway fails | Verify serial settings match WiRSa. Check cable connections. |
| External pings fail | Ensure WiRSa has WiFi connectivity. Check AT$SLIPSTAT for packet statistics. |
| Permission denied | Use sudo or add your user to the dialout group: sudo usermod -aG dialout $USER |
| Serial port not found | Ensure the serial port is enabled in BIOS/UEFI. Check setserial -g /dev/ttyS* for port status. |
SLIP Configuration:
| Command | Description |
|---|---|
AT$SLIP |
Enter SLIP gateway mode |
AT$SLIPIP=x.x.x.x |
Set gateway IP address |
AT$SLIPCLIENT=x.x.x.x |
Set client IP address |
AT$SLIPDNS=x.x.x.x |
Set DNS server |
AT$SLIPSHOW |
Show current SLIP configuration |
AT$SLIPSTAT |
Show SLIP statistics |
AT$SLIPFWD=proto,ext,int |
Add port forward |
AT$SLIPFWDDEL=index |
Remove port forward |
PPP Configuration:
| Command | Description |
|---|---|
AT$PPP |
Enter PPP gateway mode |
AT$PPPGW=x.x.x.x |
Set gateway IP address |
AT$PPPPOOL=x.x.x.x |
Set client pool start IP |
AT$PPPDNS=x.x.x.x |
Set primary DNS server |
AT$PPPDNS2=x.x.x.x |
Set secondary DNS server |
AT$PPPSHOW |
Show current PPP configuration |
AT$PPPSTAT |
Show PPP statistics |
AT$PPPFWD=proto,ext,int |
Add port forward |
AT$PPPFWDDEL=index |
Remove port forward |
AT$PPPFWDLIST |
List all port forwards |
- Press the BACK button on the WiRSa
- Send
+++escape sequence (USB serial only in SLIP mode) - Disconnect from the client side (PPP will detect link termination)
The WiRSa includes a built-in Telnet server that allows remote access to devices connected via the serial port. This is useful for:
- Vintage terminals and computers - Access systems that originally connected to serial terminals (mainframes, minicomputers, Unix systems)
- Serial console access - Remotely manage routers, switches, or embedded devices with serial management ports
- Headless systems - Access single-board computers or systems without displays
- BBS hosting - Run a BBS on a vintage computer and accept telnet connections
- The WiRSa listens for incoming TCP connections on a configurable port (default: 23)
- When a connection is made, data is bridged bidirectionally between the telnet client and the serial port
- The remote user interacts with whatever is connected to the WiRSa's serial port as if they were locally connected
Set the listening port:
AT$SP=23        - Set server port to 23 (default telnet port)
AT$SP=2323      - Use alternate port 2323
AT$SP?          - Query current port
Configure auto-answer:
ATS0=1          - Enable auto-answer (automatically connect incoming calls)
ATS0=0          - Disable auto-answer (ring and wait for manual answer)
ATS0?           - Query current setting
Telnet protocol handling:
ATNET1          - Enable telnet IAC sequence handling (recommended for telnet clients)
ATNET0          - Disable telnet handling (raw TCP mode)
ATNET?          - Query current setting
From any computer on the same network:
telnet <wirsa-ip-address> 23Or with a custom port:
telnet <wirsa-ip-address> 2323The WiRSa supports two types of incoming connections:
Console Connection (First Connection):
- The first telnet connection becomes a "console" session
- Stays in AT command mode - you can type AT commands
- Use
ATDT <host:port>to dial out to BBSes - Full modem emulation available
Call Connection (With Auto-Answer):
- When
ATS0=1is set, subsequent connections bridge directly to serial - Data passes transparently between telnet and serial
- Use
+++to escape back to command mode - Use
ATHto hang up
Scenario: You have a vintage Unix system with a serial console, and you want to access it remotely via telnet.
- Connect the WiRSa to the Unix system's serial port
- Configure WiRSa to match the system's serial settings:
AT$SB=9600 - Set baud rate (match your system) ATS0=1 - Enable auto-answer ATNET1 - Enable telnet handling AT&W - Save settings - From a remote computer, telnet to the WiRSa's IP address
- You'll be connected directly to the Unix system's serial console
Scenario: Run a BBS on a vintage computer and accept incoming telnet connections.
- Connect WiRSa to the vintage computer running BBS software
- Configure WiRSa:
AT$SP=23 - Listen on port 23 ATS0=1 - Auto-answer incoming connections ATNET1 - Handle telnet protocol AT&W - Save settings - Configure your router to forward port 23 to the WiRSa's IP address
- Users can now telnet to your public IP to access the BBS
When auto-answer is disabled (ATS0=0), incoming connections trigger a "RING" message:
RING
RING
RING
To answer manually, type:
ATA - Answer the incoming call
This is useful when you want to screen incoming connections or when the connected device needs preparation before accepting a connection.
The Utilities menu provides diagnostic tools for troubleshooting:
- Signal Monitor - Real-time display of RS232 signal states (DCD, RTS, CTS, DTR, DSR, RI)
- Loopback Test - Test serial communication integrity
- Statistics - View connection counts and byte transfer statistics
| Function | GPIO | Description |
|---|---|---|
| RXD2 | 16 | UART2 RX (from computer) |
| TXD2 | 17 | UART2 TX (to computer) |
| DCD | 33 | Data Carrier Detect (output) |
| RTS | 15 | Request to Send (output) |
| CTS | 27 | Clear to Send (input) |
| DTR | 4 | Data Terminal Ready |
| DSR | 26 | Data Set Ready |
| RI | 25 | Ring Indicator |
| SD CS | 5 | SD Card Chip Select |
| SD MOSI | 23 | SD Card MOSI |
| SD MISO | 19 | SD Card MISO |
| SD SCK | 18 | SD Card Clock |
| Button | GPIO | Function |
|---|---|---|
| SW1 | 36 | DOWN |
| SW2 | 39 | BACK |
| SW3 | 34 | ENTER |
| SW4 | 35 | UP |
This is a PlatformIO project. See README-PLATFORMIO.md for detailed build instructions.
Quick start:
# Build firmware
platformio run

# Upload to ESP32
platformio run --target upload

# Monitor serial output
platformio device monitorThe WiRSa originated as a film prop for Apple TV's "The Shining Girls," where it simulated realistic computer interaction by playing back pre-recorded text files while actors typed on vintage terminals.

- Source Code: Complete firmware, schematics (KiCAD), Gerber files, and enclosure designs (OpenSCAD) available in this repository
- Contact: nullvalue@gmail.com
MIT License - See source code header for full license text.
Copyright (C) 2026 Aron Hoekstra